Pages
▼
Thursday, October 27, 2011
Tuesday, October 25, 2011
The dresser!!
It's finally done! Not without wanting to chuck it out the window a few times though. Here is what happened... I started, thinking that I would do a reverse stencil, meaning, paint over a stencil and then peel it up and it would leave the silhoutte.. easy??!?! WRONG. My first failed attempt the stencil was a disaster!! The paint leaked under it and bled everywhere and then when I peeled it, it peeled up all the paint along with it. I had to power sand all the drawers down again and start over!!! here's what happened:
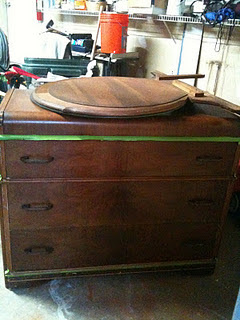
Here is the dresser when I got it from CL for $20.
Here's the next thing I did. I took my Paris Grey Annie Sloan paint and painted the exterior, leaving the drawers with the original wood color.
Next.. here comes the failed decal. I applied the decal, painted primer, and then 2 coats of paint. I have no pictures of the horrific peeling because I was too annoyed to go get my camera.
Ok.. so then I screamed and ripped my hair out and sanded. here are the newly black drawers that I sprayed after sanding them down. I realized that a black silhouette would look better than the wood anyways.
Here's the NEW affixed decal.. remember the color is irrelevant since I'll be just using it as a stencil.
Here's the process of when after the drawers were painted and I began to peel up the decal. I decided to use spray paint this time so I wouldn't have that bleed that regular paint has.
And DRUMROLL PLEASE... Here is the finished dresser after waxing and distressing the edges and corners.
And lastly here are the before/afters of the mirror that goes with it.
And one last time here is the before/after:


Tuesday, October 18, 2011
Newest project - dresser
Here is my latest redo.. I picked this baby up for $20 on craigslist including the mirror. Hands down.. this has been the most frustrating project ever!!! I will be posting the 'afters' soon and then I will be posting the complete disaster that was the project last week. Needless to say, I spent a lot of time resanding and repainting over what happened. More details to come... here are the 'befores.'


Thursday, October 6, 2011
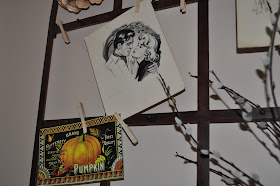
Seasonal mantel..
FALL....
Monday, October 3, 2011
antique high chair
I've been looking for a chair for Simon for a while now and I finally found one at a consignment sale for 5 bucks. It needed a little work though. I reinforced all the screws and added a couple more here and there as well as sanded and painted it. I framed out the cute 50's design. Here are the before/after shots. It's perfect for him!


